

Setting up the Unitree H1 at home takes about 2–3 hours and four phases: unbox and inspect, install and charge the 864 Wh hot‑swappable battery, connect over Ethernet (set your PC to 192.168.123.99 on the 192.168.123.x subnet), then update to the latest firmware, apply UniPwn hardening, and run calibration. Allocate at least 4 m × 4 m of clear, flat space and keep the emergency‑stop within reach before first power‑on.
What You’ll Need: Tools, Space & Time
- Unboxing tools: box cutter, clean workspace - Laptop with Ethernet port (or USB‑Ethernet adapter) for first network setup - Suspension rig or sturdy stand – the H1 must be fully supported during first boot and calibration (180 cm, 47 kg) - Safety mirror and anti‑fatigue rubber flooring (at least 4 m × 4 m) - Extension cord (heavy‑duty, 15 A rated) and the H1’s included charger - Unitree remote control (included) and your Android/iOS device for the appSetup time per phase (first‑time user, wired network):
| Phase | Time |
|---|---|
| Unboxing & inspection | 15 min |
| Battery installation & initial charge | ~1.5 h |
| Network configuration (Ethernet) | 20 min |
| App/remote binding | 10 min |
| Firmware update & security hardening | 20 min |
| SDK / ROS2 installation (optional) | 30 min |
| Calibration & first walk | 30 min |
| Total (excluding battery charge wait) | ~2 h 45 min |
Allow a full afternoon if you plan to set up SDK tools as well.
Before You Start: Safety & Space Requirements
[CRITICAL] The H1 is a world‑record‑speed humanoid (3.3 m/s) weighing 47 kg with 19 degrees of freedom. Never power on the robot if it is not completely supported by a suspension rig or stand designed for its mass. An unsupported drop during boot can cause serious damage and injury.
- Minimum floor space: 4 m × 4 m entirely clear of obstacles. A garage, studio, or spacious room is ideal.
- Floor surface: flat, non‑slip, and rigid (concrete, plywood, or thick rubber mat). Avoid carpet that can snag feet.
- Exclusion zone: mark a 1.5 m dashed border around the work area; no people or pets inside while power is on.
- Emergency stop: the primary e‑stop is the battery‑release button and the damping button combination. Keep the remote e‑stop accessible at all times.
- Overhead clearance: minimum 2.5 m – the H1 stands 1.8 m tall and may raise arms during calibration.
- Ventilation: operate in a well‑ventilated space; the 864 Wh battery charges at significant current.
- Firmware caution: newer H1 firmware (1.5.x) uses L2+B damping and L2+UP ready; older releases may use L1+A. Check your version before attempting any button sequences.
Step 1 – Unboxing & Physical Inspection
1.1 Open the crate
The H1 ships in a heavy‑duty crate. Carefully cut the straps, then have at least two people lift the lid and sides. Do not drag metal edges across the robot.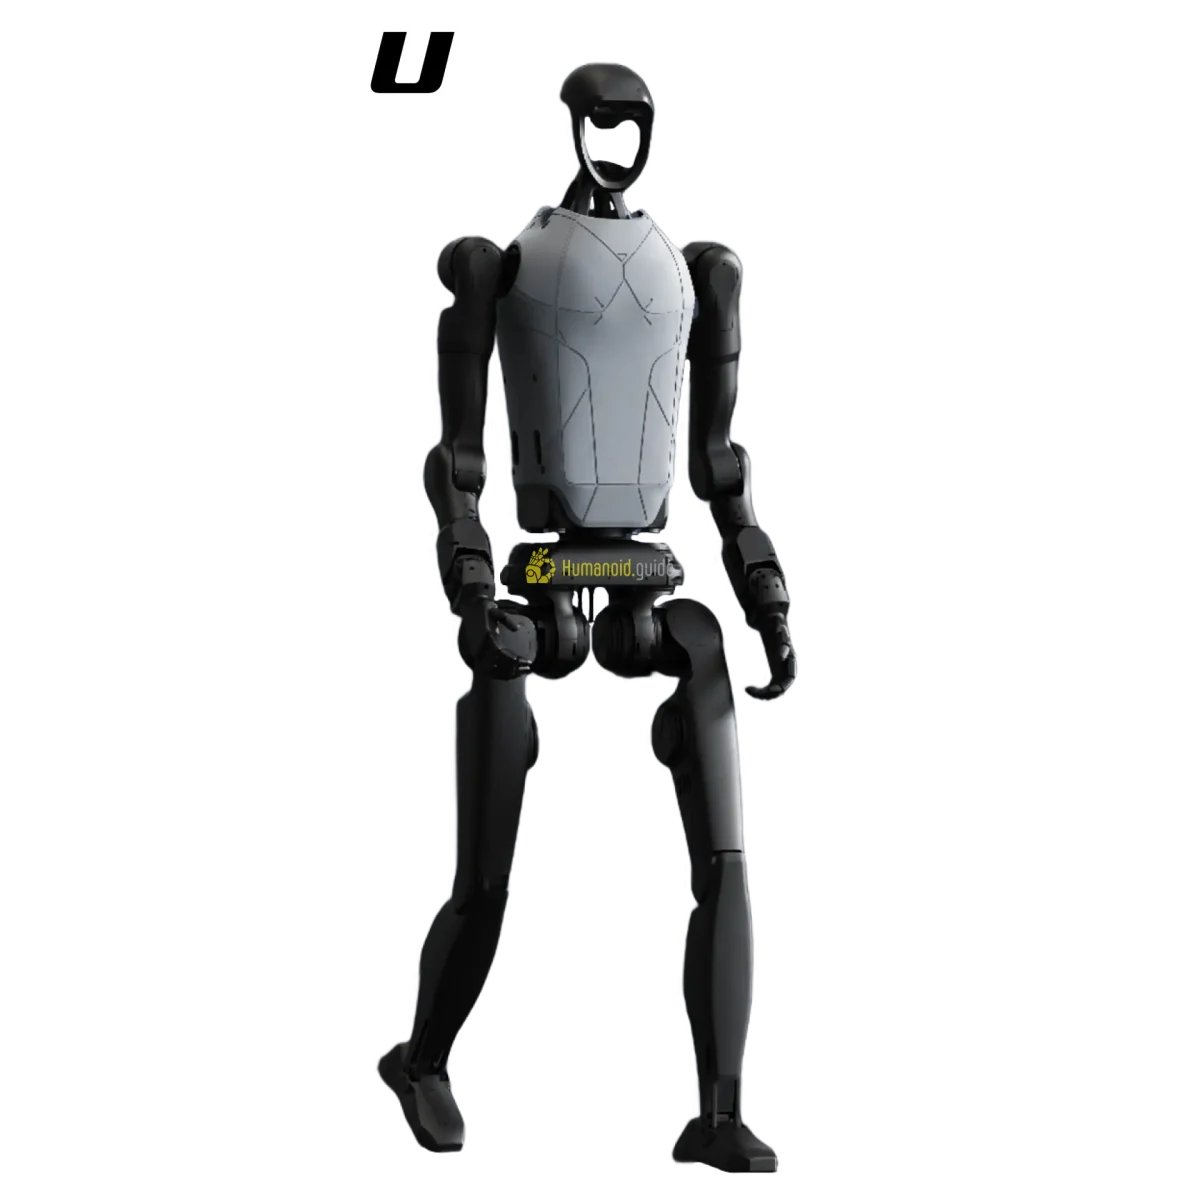
1.2 Check the inventory
Confirm all items are present: - Unitree H1 robot (limbs folded) - 864 Wh quick‑release battery (may be pre‑installed or packed separately) - 54 V charging adapter - Remote control - Ethernet cable - Documentation booklet1.3 Visual inspection
Look for any loose cables, dents, or missing fasteners on the legs, arms, and head. If you spot damage, contact Unitree support before powering on. Check that all 19 DOF can move freely by hand (with robot unpowered and suspended).Step 2 – Battery Installation & Charging
The H1 uses a 864 Wh hot‑swappable battery that slides into the backpack compartment.- If the battery is not already inserted, align the rails and push firmly until you hear a click.
- Connect the charger to the H1’s rear charging port and plug it into mains (100‑240 V AC).
- The LED ring pulses blue during charging and turns solid green when full. A full charge takes ~1.5 hours.
- For first use, charge to 100% before attempting to power on the robot.
- The battery is hot‑swappable: you can swap packs without shutting down the robot if a charged spare is available.
Step 3 – Powering On & First Boot
Always suspend the H1 from a gantry or stand before first boot. The robot must be off the ground and completely supported; never let the feet touch the floor until calibration is complete.- Press and hold the power button on the rear backpack for 3 seconds.
- The chest LED blinks white while booting, then turns solid blue when the control system is ready (~60 seconds).
- Immediately engage damping: press and hold the L2+B buttons on the remote (if firmware ≥1.5; older firmware uses L1+A). This prevents any joint movement.
- Observe the robot for any unexpected motion – if a limb twitches, release all buttons and check connections, then restart.
- Wait 2 minutes with damping active; the cooling fans will spin up – that’s normal.
Step 4 – Network Configuration (Ethernet / WiFi)
The H1 joins the common Unitree subnet 192.168.123.x/24. The onboard control computer is at 192.168.123.161; the development computer (if present) at 192.168.123.164. Avoid these IPs.Set a static IP on your laptop:
- Connect the laptop to the H1 via the provided Ethernet cable.
- Configure the wired interface to a free IP, e.g., 192.168.123.99, netmask 255.255.255.0, no gateway.
- Verify connectivity:
ping 192.168.123.161 - SSH access (if needed):
ssh [email protected]— default password 123. Change this password immediately.
WiFi vs Ethernet – Ethernet is strongly recommended for any SDK work; WiFi can introduce latency and dropped packets. If you need WiFi, configure it through the Unitree app after binding (Step 5). The robot can also broadcast its own hotspot for direct connection, but this is less stable.
| Feature | Ethernet (wired) | WiFi (robot’s AP or client) |
|---|---|---|
| Latency / jitter | <1 ms, reliable | 5‑30 ms, variable |
| Throughput | 100 Mbps+ | Up to 600 Mbps (Wi‑Fi 6) |
| SDK use | Recommended | Acceptable for low‑speed commands |
| Security | Physically local | Requires WPA2 + BLE disabled |
Step 5 – App / Remote Control Binding
- Download the Unitree Robot app from Google Play or the App Store.
- Enable Bluetooth on your phone. With the H1 powered on and damped, tap “Scan” in the app.
- Select “H1” from the list and confirm the pairing code displayed on the robot’s chest screen (if present) or LED status.
- Once paired, the app displays battery level, joint status, and basic control widgets.
- Bind the remote control: press L2+UP (new firmware) or L1+UP (legacy) on the controller until the remote LED turns solid – it is now the active command source.
Step 6 – Firmware Update & Security Hardening
6.1 Check current firmware
In the Unitree app, navigate to Settings → About Robot and note the firmware version (e.g., 1.5.1). If your unit is on a version older than 1.4.5, you are vulnerable to UniPwn (CVE‑2025‑35027) — a wormable BLE command‑injection attack that grants root access.6.2 Update to the latest release
- Download the firmware file from the official Unitree support portal or the app’s OTA section.
- Copy the file to a USB drive, insert it into the H1’s USB port (rear panel), and follow the on‑screen update procedure.
- The update takes ~10 minutes; the robot will reboot twice.
6.3 Apply UniPwn mitigations (CVE‑2025‑35027)
Even after updating, these measures harden the robot immediately: - Disable BLE provisioning when not actively pairing a new device. In the app: Settings → Connectivity → BLE Provisioning → Off. - Change the default SSH password:passwd (set a strong, unique password). - Segment the network: connect the H1 to an isolated VLAN or a dedicated router that has no internet access. The robot does not need an internet connection for safe operation. - Monitor logs: periodically check /var/log/syslog for suspicious wpa_supplicant restarts that could indicate an active exploit attempt.
> The firmware versions ≥1.4.5 introduce “Training Mode” and apply security patches that make the primary UniPwn chain ineffective, but BLE remains a high‑value target. Keep it off whenever possible.
Step 7 – SDK / ROS2 Setup (Advanced)
This section is for developers who want to send custom commands or build autonomous behaviours. The H1 uses the same unitree_sdk2 framework as the Go2 and G1.7.1 Environment
- Operating system: Ubuntu 20.04 (x86_64) with ROS2 Foxy is the officially supported combination. A virtual machine or a dedicated Linux laptop works well. - Middleware: CycloneDDS 0.10.2 (build from thereleases/0.10.x branch).
7.2 Install the SDK and Python bindings
```bash # Install CycloneDDS git clone https://github.com/eclipse-cyclonedds/cyclonedds.git -b releases/0.10.x cd cyclonedds && mkdir build && cd build cmake .. -DCMAKE_INSTALL_PREFIX=/opt/cyclonedds make -j$(nproc) && sudo make installSet environment variables
export CYCLONEDDS_HOME=/opt/cyclonedds export LD_LIBRARY_PATH=$CYCLONEDDS_HOME/lib:$LD_LIBRARY_PATH
Clone and build unitree_sdk2 (C++ and Python)
git clone https://github.com/unitreerobotics/unitree_sdk2.git cd unitree_sdk2 && mkdir build && cd build cmake .. -DCMAKE_INSTALL_PREFIX=/opt/unitree_robotics make -j$(nproc) && sudo make install
Python bindings
cd ../unitree_sdk2_python pip3 install -e . ```
7.3 Configuration
- Network interface: in your code, set the network interface name (e.g., “enp0s3”) to the one that carries the 192.168.123.x subnet. The SDK’s channel factory uses this to discover DDS participants. - DDS domain: default domain ID 0; the robot advertises theunitree_hg IDL (humanoid interface). Ensure your code initialises the correct IDL. - Power state: high‑level RPC commands require the H1 to be in ready mode (damping disabled, ready LED solid). Low‑level motor commands must be sent in debug mode (L2+R2 then L2+A) — but exit debug mode only by rebooting.
7.4 Quick test
``python from unitree_sdk2py.core.channel import ChannelFactory # Set network interface name ChannelFactory.Instance().Init(0, "enp0s3") # Verify you can receive joint states... `` A successful data stream confirms the SDK link.
Step 8 – Calibration & First Movement
Calibration aligns the 19 DOF sensors and ensures stable walking. Keep the robot suspended during the entire calibration routine.- With the remote, place the robot in ready mode: L2+UP (new firmware) until the ready LED turns solid.
- In the app, select Calibration → Full Body. The robot will slowly move each joint through its range. The process takes about 5 minutes.
- Once calibration reports “Success”, engage damping again (L2+B) and lower the robot gently onto the floor.
- Stand clear, then release damping and give the locomotion command: R2+A (new firmware) activates walk mode. Use the left joystick to move forward slowly (0.5 m/s).
- If the robot wobbles or drifts, repeat calibration. Check floor flatness and ensure all feet contact the ground evenly.
Defining Success: Minimum / Full / Advanced
| Tier | Definition |
|---|---|
| Minimum viable | Robot powers on, connects to the app/remote, stands and responds to basic locomotion commands (walk, turn) at slow speed. |
| Full operational | Networked to a PC, firmware current, calibration passed, walks reliably at up to 2 m/s in your space, and the e‑stop/pause functions work. |
| Advanced | SDK/ROS2 installed, custom code runs (joint control, teleoperation), and the H1 performs autonomous sequences or integrates with external sensors. |
Common Setup Mistakes & Fixes
| Mistake | Symptom | Fix |
|---|---|---|
| PC not on 192.168.123.x subnet | Can’t ping 192.168.123.161 | Set static IP to 192.168.123.99, netmask 255.255.255.0, NO gateway. |
| Wrong network interface name in SDK config | “Channel factory init error” | Check with ip a and use the correct en or eth interface name in ChannelFactory.Instance().Init(). |
| CycloneDDS version mismatch (0.8 vs 0.10) | DDS participant not discovered | Build CycloneDDS 0.10.2 from releases/0.10.x and set CYCLONEDDS_HOME. |
| Using L1+A damping on firmware ≥1.5 | Damping does not engage | Use L2+B; verify your firmware version in the app. |
| Robot in debug mode while trying high‑level RPC | RPC commands ignored | Exit debug mode (requires reboot). High‑level control needs ready mode, not debug. |
| Battery not fully seated | No power, no LED | Remove and reinsert the battery until you hear a firm click. |
| First boot without suspension | Robot falls (expensive damage) | Always suspend the H1 until calibration completes; never support the robot by hand. |
| BLE provisioning left enabled after pairing | UniPwn vulnerability remains open | Disable BLE provisioning in the app; keep the robot on an isolated network segment. |
| SSH password still default (123) | Security risk | Immediately run passwd after first SSH login and set a strong password. |
| Calibration on uneven floor | Drifting or wobbling | Ensure floor is perfectly flat; place a thick rubber mat if needed. |
Frequently Asked Questions
How long does it take to set up the Unitree H1? About 2 hours and 45 minutes of active work, plus ~1.5 hours of battery charging time. Calibration and network configuration are the longest steps for first-time users.
How much space does the H1 need at home? At least 4 m × 4 m of clear, flat floor, with a minimum ceiling height of 2.5 m. The robot stands 180 cm tall and weighs 47 kg.
What IP address does the H1 use? The onboard control computer is at 192.168.123.161 on subnet 192.168.123.x/24. Set your PC to a free static IP such as 192.168.123.99; avoid 192.168.123.161 and .164.
What firmware should the H1 be running? We recommend the latest release available as of mid‑2026, which includes security patches for CVE‑2025‑35027 (UniPwn). Check the Unitree support portal for your specific build, and always update before first use, because older firmware uses different control button combos.
Is the H1 safe to use at home? When proper safety protocols are followed — a suspension rig, marked exclusion zone, and remote e‑stop — the H1 can be operated safely indoors. Because of its speed (3.3 m/s) and weight, strict space rules are essential. Disable BLE provisioning after setup to prevent remote exploitation (UniPwn).
What OS and SDK does the H1 need? The SDK is unitree_sdk2 (C++ and Python) running on Ubuntu 20.04 with ROS2 Foxy. Install via GitHub clone and cmake, set CycloneDDS 0.10.2, and use the unitree_hg interface IDL.
How long does the battery last? The 864 Wh hot‑swappable battery provides about 2 hours of active walking or mixed operation. Spare batteries can be swapped without shutting down the robot.
Can I use WiFi instead of Ethernet? WiFi works for basic app control and low‑speed teleoperation, but Ethernet is strongly recommended for SDK development and high‑bandwidth telemetry due to lower latency and higher reliability.
Why won’t the H1 respond to SDK commands? If you are using high‑level RPC, the robot must be in ready mode (not debug mode) and the AI sport client must be active. For low‑level motor commands, you must enter debug mode (L2+R2 then L2+A). Also verify the network interface name in your channel factory and that CycloneDDS is correctly built.
What does the H1 cost, new and used? New, the H1 is priced between $90,000 and $150,000 depending on configuration and accessories. Used/resale units appear occasionally — check the Unitree H1 Robot Database page on Robot Overflow for current marketplace availability and pricing.
Comments