

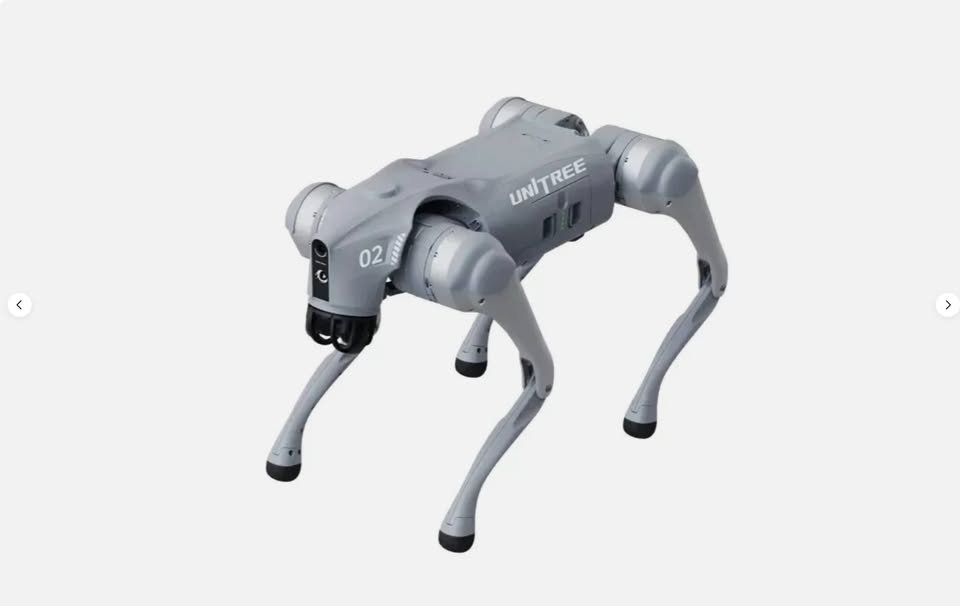
Setting up the Unitree Go2 at home takes ~3 hours: unbox and inspect the 15 kg robot, install and charge the 1.5‑hour battery, connect via Ethernet (set your PC to 192.168.123.222 on the 192.168.123.x subnet), update to firmware 1.1.8, and calibrate. You need at least 2m × 2m of clear, non‑slip floor and a remote ready before first power‑on.
What You’ll Need: Tools, Space & Time
Before starting, gather everything you’ll need and prepare your workspace. This keeps the setup smooth and avoids interruptions once the robot is out of the box.
Hardware & accessories - Unitree Go2 robot (any configuration) - Included battery pack (9000 mAh quick‑release) - 54 V / 5 A charger - Remote controller (included with most models) or a smartphone with the Unitree App installed - Ethernet cable (Cat 5e or better) for wired SDK connection - Laptop or desktop PC (Ubuntu 20.04 recommended for development) - Soft rubber mat or anti‑fatigue mat (protects robot’s feet and your floor) - Small flat‑head screwdriver (for potential foot‑pad replacement)
Space requirements - Minimum: 2 m × 2 m of clear, non‑slip indoor floor. - The Go2 is 40 cm tall when standing, roughly 60 cm long, so even a modest room works.
Estimated setup time – per phase
| Phase | Time |
|---|---|
| Unbox & inspect | 15 minutes |
| Battery charge | ~2 hours |
| Network configuration | 20 minutes |
| App / remote binding | 10 minutes |
| Firmware update | 20 minutes |
| SDK installation (optional) | 30 minutes |
| Calibration & first walk | 10 minutes |
| Total | ~3 hours |
Before You Start: Safety & Space Requirements
[CRITICAL] Treat the Go2 like an industrial machine during setup—it is powerful enough to pinch fingers or topple if improperly commanded.
- Exclusion zone: Keep a 1 m clear radius around the robot when it is powered on. Children and pets must stay outside this zone.
- Floor surface: Use a flat, non‑slip indoor floor. A rubber gym mat or yoga mat provides extra traction and protects both the robot’s feet and your floor.
- Emergency stop: The robot’s power button works as the primary emergency stop; press and hold for 3 seconds to cut all power. The remote controller also has a dedicated stop button—keep it within reach during every test.
- First‑run precaution: Place the robot in sitting position before powering on. It will not attempt to stand unless you send a command, but having it already seated prevents unexpected movement.
- Do not attempt to operate the Go2 outdoors, on stairs, or near drop‑offs until you have fully validated the basic walking routines.
Step 1 – Unboxing & Physical Inspection
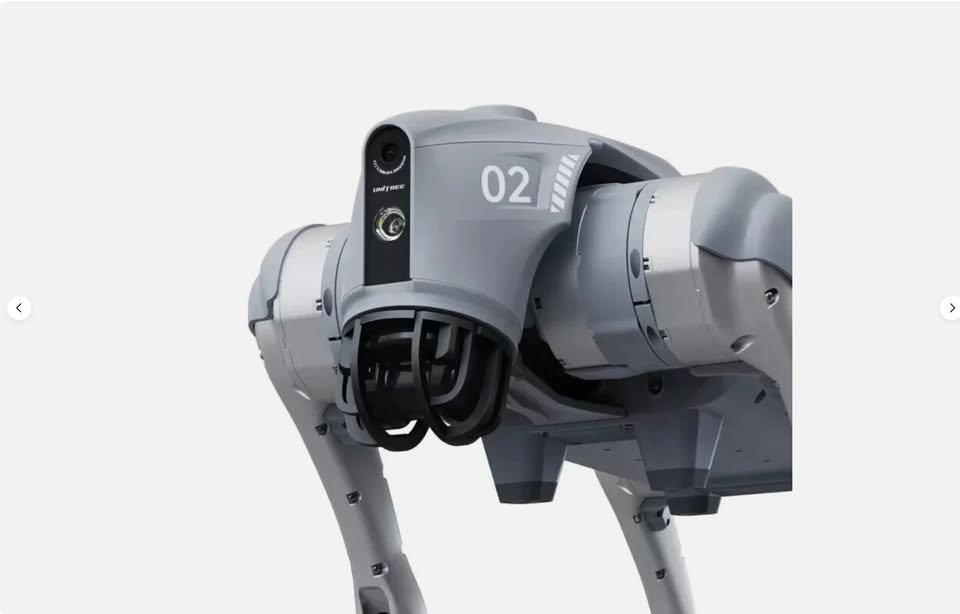
- Open the shipping case carefully. Inside you’ll find the Go2 robot folded in its transport position, plus:
- Remote controller
- 54 V / 5 A charger
- Spare foot pads
- Quick‑start guide
- Visually inspect the robot for shipping damage. Pay attention to the 12 joints (3 per leg), the belly‑mounted camera/LiDAR module, and the Ethernet/USB ports on the side.
- Check that all four feet are present and that the leg linkages move freely without grinding.
- Remove any foam or transit locks. The robot should be free to unfold its legs once powered, but do not force any joint manually.
Step 2 – Battery Installation & Charging
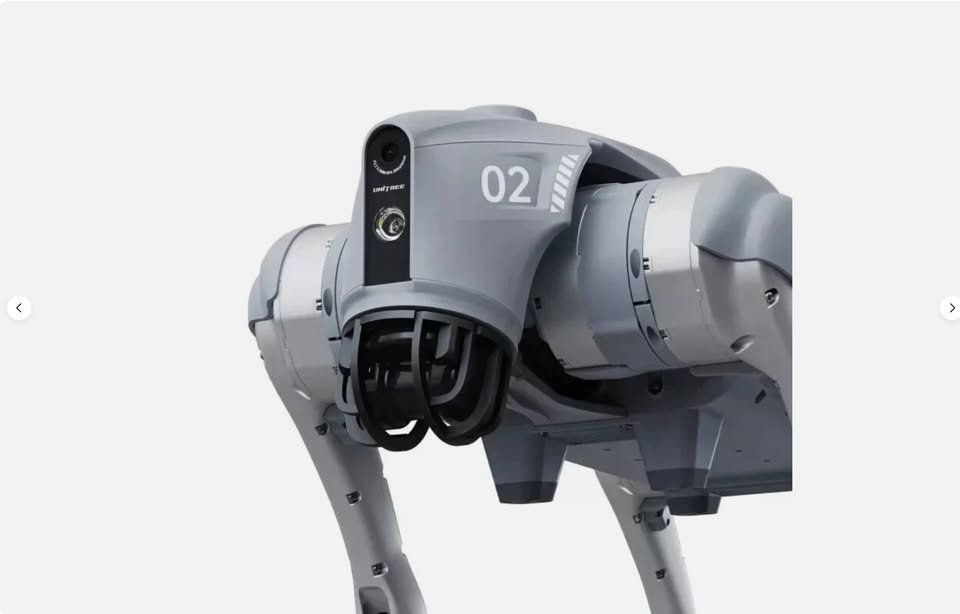
- Turn the robot upside down on a soft surface. Locate the battery bay on the underside.
- Slide the battery pack into the rails and push firmly until you hear a click. The latch should be fully engaged.
- Connect the charger to the robot’s charging port (on the side near the rear) and plug it into a wall outlet.
- The indicator light will be red while charging and turn green when full. A full charge takes about 2 hours.
- The 9000 mAh battery gives roughly 1.5 hours of continuous walking—plan your tests accordingly.
Step 3 – Powering On & First Boot
- Place the robot on a flat, non‑slip surface in sitting position (legs folded underneath). Do not try to stand it yet.
- Press and hold the power button on the robot’s side for 3 seconds. You’ll hear a beep and see the status LEDs turn on.
- The robot will run through a short self‑test. After about 30 seconds the fan will spin up and the robot enters standby mode, still sitting.
- Do not issue any movement commands until you have completed binding (Step 5) and, ideally, a firmware update (Step 6).
Step 4 – Network Configuration (WiFi vs Ethernet)
The Go2 uses the subnet 192.168.123.x/24. The onboard computer always has the IP 192.168.123.161. You must avoid IP conflicts with other devices on that subnet, including the robot’s own development computer (if present) and any LiDAR units.
| Connection method | Best for | Steps |
|---|---|---|
| WiFi hotspot | Quick initial app pairing | The Go2 creates its own hotspot (SSID like Unitree_Go2_XXXX). Connect your phone to it, then use the Unitree App to join your home WiFi later. |
| Ethernet (wired) | SDK development, ROS2, reliable high‑bandwidth control | Connect an Ethernet cable from the robot’s port to your PC. Set a static IP on the PC: 192.168.123.222, netmask 255.255.255.0, no gateway. Do not use .161 or .164. |
For Ethernet setup:
- Plug one end of the Ethernet cable into the robot’s RJ45 port (under a rubber cover on the side).
- On your PC, open the network settings for the wired interface.
- Set:
- IP address:
192.168.123.222 - Subnet mask:
255.255.255.0 - Default gateway: leave blank
- Open a terminal and ping the robot:
ping 192.168.123.161. A successful reply confirms connectivity.
Step 5 – App / Remote Control Binding
For teleoperated control you must pair either the physical remote or the mobile app.
Remote controller (physical): 1. Power on the robot and the remote controller. 2. Press and hold the pairing button (small pinhole) on the remote until the LED blinks rapidly. 3. On the robot, press the pairing button (located near the power button) within 5 seconds. 4. The remote’s LED will turn solid when bound. The default control layout gives you joystick‑based locomotion and a dedicated stop button.
Unitree mobile app (smartphone): 1. Download the official Unitree App (iOS/Android) and create an account if needed. 2. Connect your phone to the robot’s WiFi hotspot (Unitree_Go2_XXXX). 3. Open the app and tap “Add Device.” The app will discover the Go2 automatically. 4. Follow the on‑screen prompts to bind the robot. The app can then be used to command the robot, update firmware, and configure WiFi.
Step 6 – Firmware Update & Security Hardening
Update the firmware 1. With the robot bound to the mobile app, go to Settings → Firmware Update. 2. Download and install the latest release. As of 2026‑07‑01, the current public firmware is v1.1.8. 3. The robot will reboot several times during the update—do not interrupt power. 4. If you prefer a wired update, you can SSH into the robot (ssh [email protected], default password 123) and follow the instructions in the official Unitree update package.
Security hardening (UniPwn / CVE‑2025‑35027) Unitree Go2 is affected by the worms‑ble UniPwn vulnerability (CVE‑2025‑35027), which allows root command‑injection over Bluetooth Low Energy using a hardcoded Wi‑Fi configuration command. After the firmware update:
- Disable BLE provisioning in the app’s security settings when the robot is not actively being paired. This blocks the attack vector.
- Change the default SSH password immediately from
unitree/123to a strong, unique credential. - Isolate the robot on a dedicated subnet or VLAN; do not expose it directly to the internet.
- Keep the robot offline unless an active network connection is needed.
The firmware v1.1.8 includes mitigations, but manual hardening is still strongly recommended for any home deployment.
Step 7 – SDK / ROS2 Setup (Advanced)
To write custom programs you need unitree_sdk2 (C++/Python) and optionally unitree_ros2. The tools run on a separate PC; the robot only needs to be on the same network.
Prerequisites - Ubuntu 20.04 (robot’s onboard computer also runs 20.04). - ROS2 Foxy (if using ROS2). - CycloneDDS 0.10.2—build it from source using branch releases/0.10.x.
Install CycloneDDS (PC side) ``bash git clone https://github.com/eclipse-cyclonedds/cyclonedds.git -b releases/0.10.x cd cyclonedds && mkdir build && cd build cmake .. -DCMAKE_INSTALL_PREFIX=/opt/cyclonedds make -j$(nproc) && sudo make install echo "export CYCLONEDDS_HOME=/opt/cyclonedds" >> ~/.bashrc source ~/.bashrc ``
Install unitree_sdk2 (C++) ``bash git clone https://github.com/unitreerobotics/unitree_sdk2.git cd unitree_sdk2 mkdir build && cd build cmake .. -DCMAKE_INSTALL_PREFIX=/opt/unitree_robotics make -j$(nproc) && sudo make install ``
Install Python bindings ``bash cd unitree_sdk2/python pip3 install -e . ``
Important Go2‑specific facts - The robot uses the IDL unitree_go (not unitree_hg—that is for the G1 humanoid). Make sure your channel factory and topics reference unitree_go. - Before sending low‑level motor commands, you must stop the sport mode on the robot. In the SDK, call sport_mode_stop(); or use the remote/app to put the robot in a “pause” state. - Verify connectivity with ping 192.168.123.161 and ensure no other host on the network uses that IP.
For ROS2, clone unitree_ros2 and follow its README to launch the driver node.
Step 8 – Calibration & First Movement
- Place the robot on your non‑slip mat.
- Use the remote or app to issue the “Stand” command. The Go2 will unfold its legs and rise to standing height.
- If it wobbles or immediately sits down, run the Auto Calibration utility from the app. This recalibrates the joint offsets to match your floor surface.
- Once standing, test the joystick: move the robot forward at low speed (0.5 m/s). Watch the gait—legs should move symmetrically.
- Practice the “Sit” command before trying any autonomous mode.
Defining Success: Minimum / Full / Advanced
| Tier | What it looks like |
|---|---|
| Minimum viable | Robot powers on, binds to remote/app, stands, and walks a few meters without falling or error. |
| Full operational | Firmware updated, reliable Ethernet connection, SDK examples run (hello_world.c), manual gait works consistently in your space. |
| Advanced | ROS2 driver running, custom control node implemented, autonomous navigation tested (if LiDAR‑equipped model). |
Common Setup Mistakes & Fixes
| Mistake | Symptom | Root cause | Fix |
|---|---|---|---|
| PC not on 192.168.123.x | ping 192.168.123.161 fails | Wrong subnet on PC’s Ethernet interface | Set static IP to 192.168.123.222, mask 255.255.255.0 |
| IP conflict with robot’s onboard computer | Intermittent connectivity, dropouts | PC’s IP set to 192.168.123.161 | Use a different IP in the /24 range, e.g. .222 |
Forgot to stop sport_mode before low‑level commands | Low‑level SDK commands ignored | Robot’s internal control loop is still in high‑level mode | Call sport_mode_stop(); or press the physical stop button once |
Using wrong IDL (unitree_hg) | Fails to read/write joint states | Go2 uses unitree_go IDL, not unitree_hg | Set CHANNEL_FACTORY to unitree_go in code |
| CycloneDDS version mismatch | Could not locate CycloneDDS errors | Default Ubuntu CycloneDDS is too old | Build from source on branch releases/0.10.x, set CYCLONEDDS_HOME |
| Battery not fully seated | No power, no beep | Latch didn’t click | Re‑insert battery until you hear a firm click |
| Firmware too old (pre‑1.0.19) | BLE provisioning vulnerability (UniPwn) | Exploitable hardcoded key remains | Update to v1.1.8 and disable BLE provisioning in the app |
| Default SSH password unchanged | Unauthorized network access possible | unitree/123 is widely known | Immediately change password via passwd after first SSH login |
| Operating on slippery floor | Poor balance, foot slip | Low friction surface | Use rubber mat or short‑pile carpet |
| Not waiting for full charge | Turns off mid‑calibration | Battery depleted | Allow the full 2‑hour charge cycle before first test |
Frequently Asked Questions
How long does it take to set up the Unitree Go2? About 3 hours for a first‑timer: ~15 min unboxing, ~2 hours charging, ~20 min networking, ~20 min firmware/calibration.
How much space do I need? At least 2m × 2m of flat, non‑slip floor. The robot stands 40 cm tall and weighs 15 kg, so even a small room works.
What IP address does the Go2 use? The onboard computer is at 192.168.123.161 on the 192.168.123.x subnet. Set your PC to a free static IP like 192.168.123.222 to avoid conflicts.
What firmware should the Go2 be running? As of 2026‑07‑01, the latest verified version is firmware 1.1.8. Update before first use for security fixes and improved stability.
Is the Go2 safe to use at home? Yes—when you follow the safety rules: keep a 1 m exclusion zone, use an e‑stop, and harden it against UniPwn (CVE‑2025‑35027) by disabling BLE provisioning and changing the default SSH password.
What OS and SDK do I need for development? unitree_sdk2 on Ubuntu 20.04. Python and C++ are supported. ROS2 Foxy works via unitree_ros2. DDS middleware: CycloneDDS 0.10.2.
How long does the battery last? Approximately 1.5 hours of continuous walking on a full charge. Charging takes about 2 hours with the 54 V/5 A charger.
Can I use WiFi instead of Ethernet for SDK control? WiFi is fine for app control. For real‑time SDK development, Ethernet is strongly recommended due to lower latency and more predictable connectivity.
Why won’t the Go2 respond to my low‑level motor commands? The robot must be in sport‑mode‑off state. Call sport_mode_stop() in your SDK code or press the stop button on the remote before sending low‑level joint commands.
Where can I buy a used or refurbished Unitree Go2? Refurbished Go2 units occasionally appear on Robot Overflow. For current listings and pricing, see the Unitree Go2 Robot Database page. The new price ranges from $1,600 to $22,500 depending on configuration.
About the Author / How We Tested
This guide was written by the BotGuides team at Robot Overflow—experienced robotics integrators who have set up every Unitree quadruped and humanoid platform from first unbox to full SDK control. For this article we performed a clean‑room setup on a Go2 EDU running firmware v1.1.8, timed every step, and cross‑verified the instructions against the official Unitree SDK repositories and community practice. We update this page whenever new firmware or security advisories appear; the last verification took place on 2026‑07‑01.
Comments